Ligurian Focaccia
If you’ve never been to the Italian Riviera and tried authentic Ligurian focaccia, or fügassa, it’s hard to describe what you’re missing. It’s only an inch high, oily but not greasy, salty yet sweet, soft though not spongy. Even the topography is unique: crunchy, golden hills dive into soft, creamy valleys to create a delectable landscape, as pleasing to the eyes as it is to the palate. In Liguria, focaccia is an institution, a birthright, a ritual. Contrary to most foods in Italy, it can be eaten any time of the day, even (gasp!) while walking down the street. Locals (myself included) will even dip a thin slice of focaccia in our cappuccinos in the morning, a custom that induces skepticism and disapproval amongst Italians outside this region.
With no further ado, here is my highly-requested recipe for Ligurian focaccia! Be sure to use the best-quality, mild tasting extra virgin olive oil you can find. The first time I made this I used a cheap, bitter-tasting oil and it really altered the taste of the final product. You can adjust the pan sizes slightly, but don’t vary more than an inch because it will effect greatly the thickness of the focaccia.
Ligurian Focaccia
For the sponge
1/4 cup (60 ml) cool to lukewarm (not hot) water
1/4 teaspoon (0.6 g) active dry yeast
1 cup (130 g) all-purpose flour
For the dough
2 1/4 teaspoons (6.3 g) active dry yeast
2 tablespoons lukewarm water
1 recipe sponge (above)
3 3/4 cups plus 1 tablespoon (500 g) all-purpose flour
1 1/2 teaspoons (9 g) salt
1 tablespoon (12 g) sugar
1 cup plus 3 tablespoons cold water (280 ml), divided
2 1/2 tablespoons good quality extra virgin olive oil
For the pans
2, 10.5 x 15.5 inch or 11 x 17 inch baking sheets or jelly-roll pans (alternatively, you may also use 1 large, 20 x 15 inch baking sheet)
1/4 cup (60 ml) good quality extra virgin olive oil
For the brine
1 cup (236 ml) hot water
1 3/4 teaspoon (11 g) salt
To finish
1/4 cup good quality extra virgin olive oil, plus more for brushing
Prepare the sponge: the night before you bake, stir together the water and yeast until the yeast dissolves. Add the flour and knead briefly by hand until a shaggy dough forms. Transfer to a small bowl or jar where the sponge touches the sides yet has some room to grow vertically (this is important for the sponge to develop correctly). Cover with plastic wrap and let sit at cool room temperature overnight (12-14 hours).
Make the dough: The next day, dissolve the yeast in 2 tablespoons lukewarm (not hot) water in small bowl. In the bowl of a stand mixer with a hook attachment combine sponge, flour, sugar and 1 cup plus 2 tablespoons very cold water (you will add the remaining 1 tablespoon cold water later). Mix on low speed until a shaggy mass forms, then raise to medium speed and knead for about 5 minutes. Add the olive oil and the yeast-water mixture, continue to knead for another 3 minutes on medium speed. Add 1 tablespoon of water and continue to knead until the dough is smooth and elastic, about 5-10 more minutes.
Add the olive oil and the yeast-water mixture and continue to knead for another 5 minutes. Add the remaining 1 tablespoon of water and continue to knead until the dough is smooth and elastic, 5 to 10 more minutes.
Lightly flour a clean work surface and turn the dough out onto it. Using a bench scraper or large knife, divide the dough in half. Slightly stretch and flatten one portion into an oblong shape, then fold into thirds, like folding a letter. Rotate the dough 90 degrees, stretch, and fold into thirds again. Gently stretch the dough into a rounded brick shape and set aside, seam-side down. Repeat with the second half of the dough. Lightly flour the tops of the two loaves, then cover with a clean, dry kitchen towel or plastic wrap. Set aside to rest at room temperature until doubled in size, about 30 minutes.
Prepare the pans: Pour 2 tablespoons of olive oil in the center of each baking sheet and spread with your fingers to grease the bottom of the sheets, leaving a 2-inch border around the edge ungreased. Gently roll out each dough with a flour-dusted rolling pin to a thickness of about 1⁄2 an inch, and transfer both doughs to the oiled sheets. (The dough will not fill up the entire sheets; it will cover only about 3⁄4 of the surface area at this point.) Cover sheets with a clean dish towel or plastic wrap and let rise in a draft-free place for 20 to 25 minutes.
Proof in pans: Uncover, dust lightly with flour, and gently stretch the dough to the ungreased edges of the pan. (If you pull a corner and it springs back, cover the dough and let it rest another 15 to 25 minutes until it holds its shape when stretched.) Press the dough into the edges of the pan with your fingertips, creating a seal so that the brine won’t seep under later. Cover and set aside to rise for 1 hour to 1 hour and 15 minutes.
For the brine: Stir together hot water and salt until the salt is completely dissolved, 3 to 5 minutes. Uncover the dough and test with your finger; if it springs back when you make a firm indentation in the dough, it’s not ready yet. Cover and let proof a little longer until the indentation remains when firmly pressed. Sprinkle the surface with a bit of flour. Place one baking sheet on the table in front of you with the short side closest to you. Use only your index, middle, and ring finger at a 45° angle from the pan. You don’t want to use only the tips as if you were typing on a keyboard, but the entire pad of your fingers as if you were trying to leave your entire fingerprint. Starting at the top, left-hand side of the tray, press the pads of your index, middle, and ring finger firmly into the dough, moving them very slightly forward and backward to elongate the dimples. Lift fingers and move down to create another 3 dimples about 1⁄2 an inch below the first row. Work your way down the entire left side of the pan, stopping a few inches from the bottom when the hand position gets uncomfortable. Repeat until the entire tray is dimpled, then turn tray 180° in order to dimple the remaining area. You can watch this dimpling done in this video. Repeat with the other tray of focaccia. Pour half of the brine over the dough in each tray and sprinkle each with 2 tablespoons of olive oil. The brine will seem like way too much but have faith! It should fill all the dimples. Let proof again for 40 to 45 minutes uncovered.
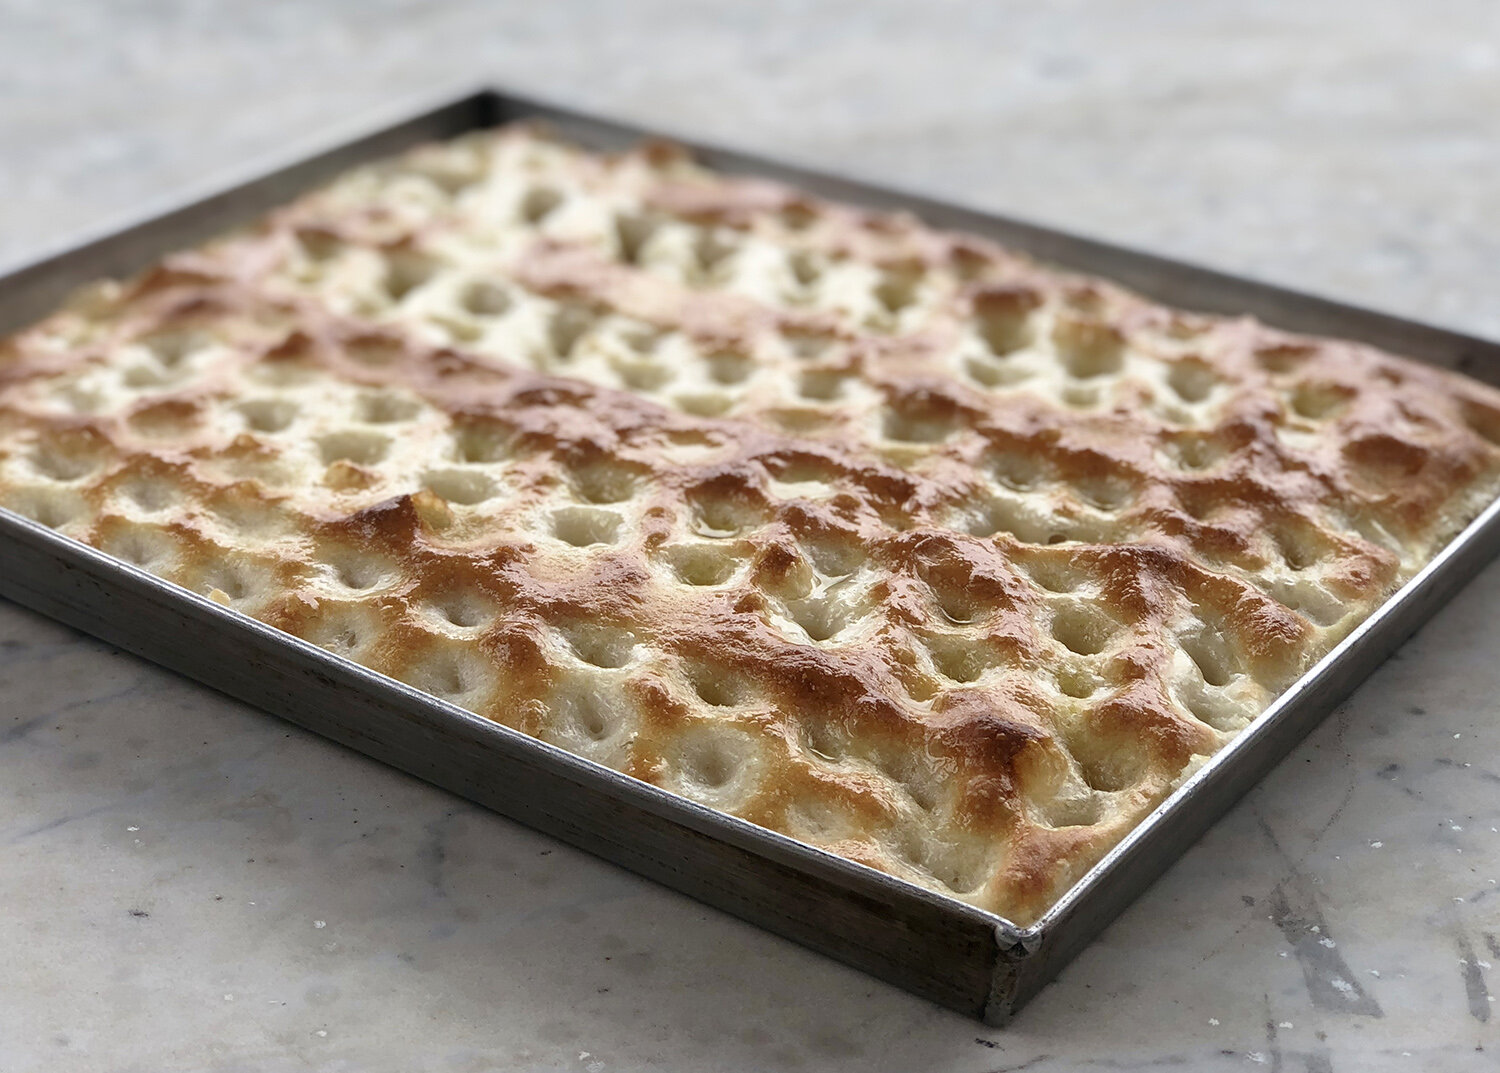
Bake: Preheat the oven to 450°F with one rack placed in the upper third and one placed in the lower third of the oven. When the oven is hot, bake the focaccia for 15 to 18 minutes, rotating trays between the top and bottom racks and turning them back to front halfway through cooking time. The focaccia is ready when it is golden, but the dimples are still light beige. Remove from oven and brush immediately with olive oil. Remove from the baking sheet immediately and let cool upside down, so the bottoms don’t get mushy. Eat your Ligurian focaccia while it’s still warm!